Images are one of the most important elements in today’s websites.
Big hero images, catalogs, galleries, online shops, portfolios, posts featured images, photos of the company’s team (most of the times including a naughty dog), photo backgrounds, illustrations…
Images are all over the place. And that’s great, because they actually have many advantages:
They are attractive.
They help to convey an idea.
They tell a story.
They set a mood.
They generate identification and empathy.
They support a brand’s personality.
They help make things feel more real.
But that comes at a price.
Image files usually have a large size and each image you upload to your site will impact the site’s load time. Is as simple as this: if your website has more bytes to load, it’ll take longer to load.
What can you do about that?
If your site is full of images, if your site takes ages to load, if you’re planning to build a site that will include images, if you have no idea what image optimization means…
If you’re one of those that take a photo of your product and directly upload it to your site, if you’re one of those who doesn’t even look at the image details before uploading it…
If you get surprised when WordPress tells you that the file you’ve uploaded exceeds the allowed limit…
…There’s a lot you can do about it.
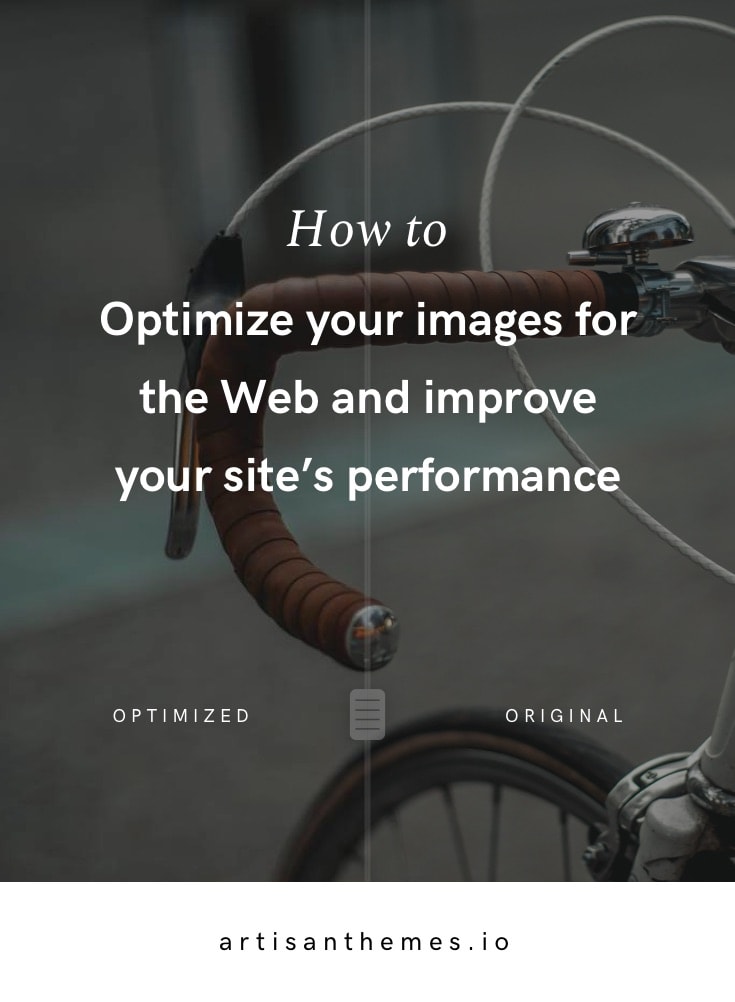
Meet Image Optimization
Each image you use on your website should be optimized for the web. That means, it should have an optimal size so your site’s loading doesn’t get affected by it, or the least possible.
The benefits
✓ Lighter site, less space on your server and less bandwidth
Optimizing your website’s images means making them lighter, less heavy. When the images are less heavy, the whole site gets lighter.
Lighter images also occupy less space on your server and reduce the data transferred when a visitor browses your site.
Therefore…
✓ Better performance
When your site is lighter, loading speed gets much better. If your site took several seconds to load before optimizing your images, these could now become milliseconds.
Therefore…
✓ Better user experience
Better performance means a better user experience. If the user needs to wait for your content to load, she will probably abandon your site before she even gets to see it.
Also, a faster website looks more professional in the eye of the user.
Imagine visitors who are browsing from a mobile device. Waiting for a website to load can significantly affect their connection to your brand because a user doesn’t just want the answers you can give to him, he also wants them when he needs them.
And…
✓ SEO improvements
Since a faster website could result in ranking higher in Google’s results, a better overall performance also improves your website SEO.
4 ways to optimize your images
Now, this list will go:
from the simpler to the more complex way,
from the must to the more optional task,
and in a compound logic – each item complements and adds value to the previous one.
According to your specific website, performing item 1 on the list may be enough. But if you’re in charge of a bigger site with a lot of images and a lots of traffic, you may want to get items number 3 or 4 done too.
Want to make sure your site is ready an optimized for your visitors? Download the ultimate WordPress website checklist now for free.
1. Reduce file size before uploading
An image file size is mostly affected by its dimensions, quality, and file format. By modifying those, you’ll be able to significantly reduce the size of your images.
Dimensions
The first thing you’ll want to do is make sure the image you’re about to use fits the size of the place where it is going to be, as close as possible.
You don’t want to upload a smaller image than you need because it’ll get pixelated when enlarged. And you don’t want to upload a much bigger image because you could be saving in weight if you downscale its dimensions.
Professional photos usually have a width around 5000px. In web terms, that’s huge.
The larger screen size commonly used right now is 1920px wide, while 1366 x 768 is the most common one. (Source: Browser Display Statistics – W3Schools).
If you’re planning on using a full-width image, I’d say resizing it to something between 1400 and 1600px wide will be a good balance between keeping it large and making it lighter at the same time.
Just by reducing the dimensions of your image, you’ll already reduce its weight.
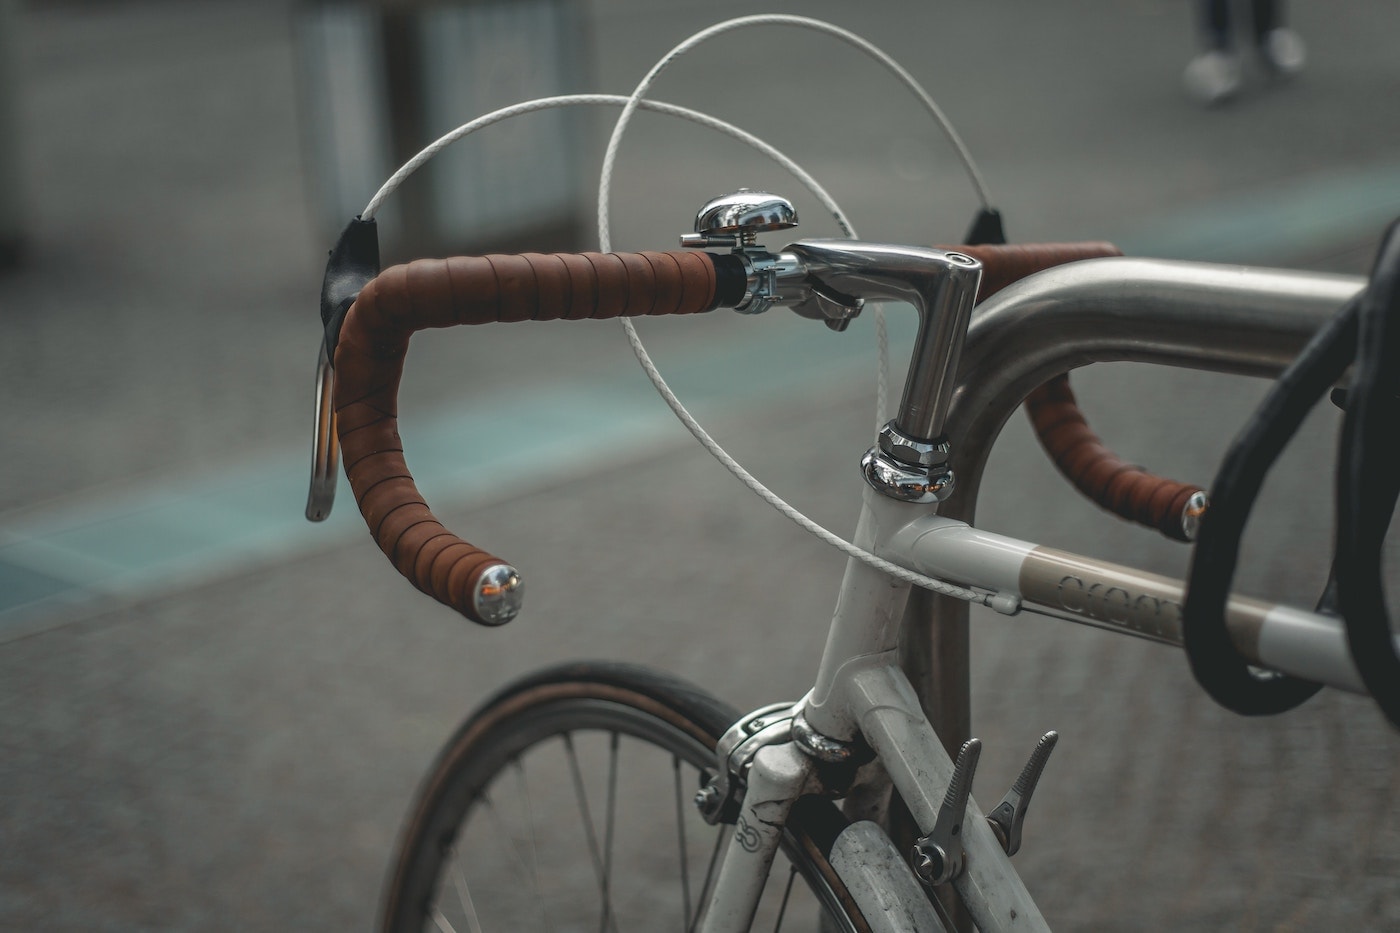
Take a look at this example:
Version 2: 1400 x 933 – 140KB
The original version of this image is 4964 × 3309 and weights 2.3MB, which is a lot.
If we just downscale it to 1400 x 933, its weight automatically drops to 140KB, which is about 6% of the original size.
140KB is an enormous difference, but it still isn’t enough.
Quality
After you adjust the dimensions of your image you need to reduce its quality so it gets even lighter.
Before you get all scared about that, reducing it’s quality it’s not about making it look ugly and cheap. No. It’s about lowering the amount of data we use to represent it on the website.
On major design or photo editing apps, the quality of an image can be reduced from 100% to 0%. How much you will actually reduce will depend on:
- The image itself – If it’s an image with many details and colors or if it has less graphical information. While reducing the quality value, an image with a lot of details will look worse to the eye sooner than one with less detail.
- The purpose of the image – If you’re going to use it on a photographer’s website to promote its wedding pictures, you may want to sacrifice size but get a higher quality image instead. Or if you’re going to use the image on a big hero section, quality may be more important than the case where you use the image in a smaller size.
I usually use a quality degree around 40% – 50%.
Here’s the resulting image after adjusting its quality: it only weights 56KB now.
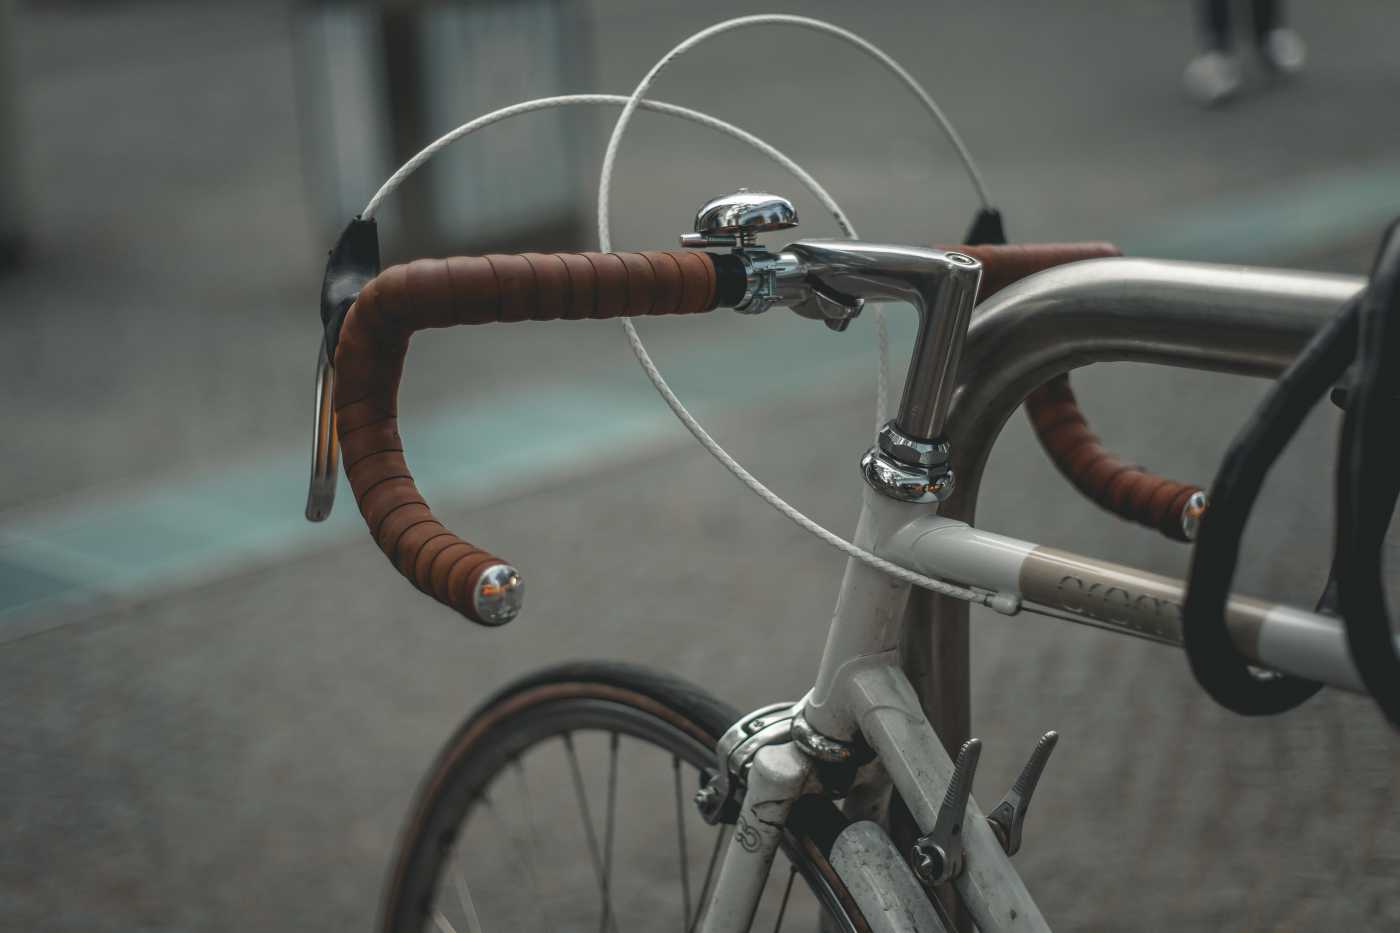
Version 3: 1400 x 933 – 56KB
File format
The most common formats for images on the web are JPEG (or JPG), PNG and GIF.
In most cases, JPEG is the format that results in a lighter image. It compresses the image and allows you to choose a quality degree, as I explained before.
PNG is mostly used when you need the image to have a transparent background, which JPEG doesn’t allow. Like when using a logo, an illustration, etc. It creates higher quality images (because it doesn’t compress the images as JPEG does), but also heavier files. Therefore, it’s mostly used in smaller amounts and for smaller images.
Lastly, GIF is recommended for animated images.
In conclusion, using JPEG will be the best choice in most cases. And use PNG when you need the image to have a transparent background.
Tools to do all this
Now that we covered the 3 factors involved, here’s how to achieve it. There are basically 2 ways of managing dimensions, quality and file format:
a. Using a software like Photoshop / Illustrator / Sketch
The specific instructions may vary according to the software you’re using, but they all basically work with the same logic.
Open your image in one of these apps (or any other design or photo editing software). Find the Save for Web or Export command.
You should then see a window with many export options, including dimensions, quality and format.
Choose JPG as format, reduce the dimensions to 1400px wide and finally adjust the quality degree till it matches what you’re looking for.
Save or export, and that’s all.
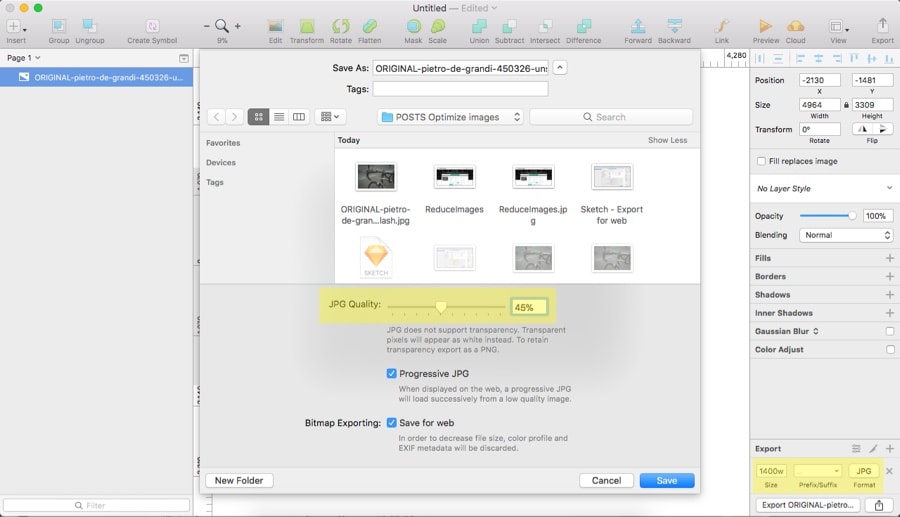
Check what’s the size of your image now.
b. Using an online tool like Reduce Images
There are many online tools that allow you to upload an image and download an optimized version of it. I’ve tried many and this is the one that I found most useful.
Reduce Images is a free tool that lets you modify the dimensions, quality and file format of any image you upload.
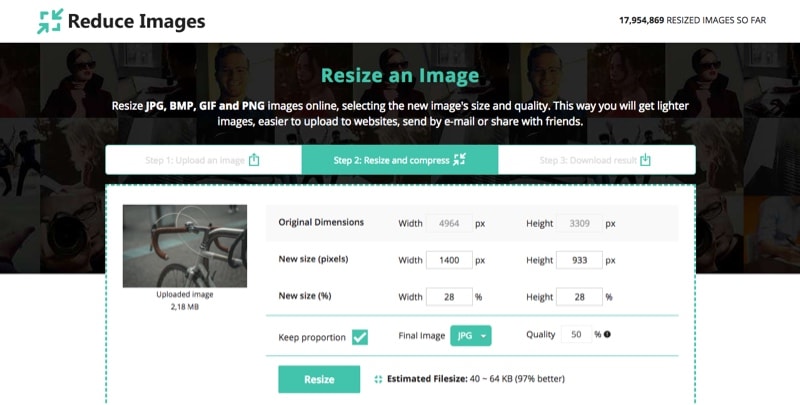
Reduce Images – Dimensions, quality, file format.
It’s really easy to use. Just upload the original image and select your preferences.
That’s it. Once the optimized image is ready, you can download it. And you can even make new versions of the same image without uploading it again.
I like my images to have a size around 80KB-120KB, the smaller the better. If it’s a big hero image, maybe I let it get to something like 180KB-240KB. But I try to avoid that.
2. Use an image optimizer like ShortPixel or Imagify
In addition to manually adapt the size of your images, you can use an optimizer tool to make them even lighter.
ShortPixel and Imagify are online services that compress and optimize the images on your site. They reduce image sizes even further while maintaining their quality as much as possible.
How do they work? Basically, they send the original images to their cloud where they are compressed. Then they download the optimized images that replace the original ones on your website.
They store the original photos too, so you can restore your media in their original versions when you need to.
Both of them have specific plugins for WordPress, which is great. And both of them offer different pricing plans, including a free one.
This is the plugin for ShortPixel: wordpress.org/plugins/shortpixel-image-optimiser/
And this is the Imagify plugin: wordpress.org/plugins/imagify/
When using the optimizer tool, you’ll be able to choose between different levels of optimization according to your site’s needs. From a hard compression that will make your images a lot lighter and with less quality (which most of the times is not actually noticeable by the human eye) to softer compression levels that will maintain the quality of the images a little more.
If you’re a photographer you may want to choose softer levels of compression, but if you’re running a regular business website or an online shop where the priority is performance, a harder compression will be the best choice.
If, for whatever reason, you didn’t manually compress your images (if you skipped item 1 on this list and all your images are already uploaded to your site), you can still use an optimization tool like these here. It’ll do a great work too.
Important tip:
It’s worth mentioning that this kind of tools usually offer different credit plans including a specific amount of images to compress. Like 100 images per month, or 5000 images per month.
You may think one image you upload to your site equals one image to compress, but it is not quite like that.
When you upload an image to your WordPress site, your theme takes care of cropping and resizing it to different sizes. That means that a single image will have multiple versions that the theme will use all over your site.
Each one of these versions is seen as a separate image by your optimization tool because it has to optimize each one of them. So, if your theme makes 4 versions of a single image, one image you upload will represent a total of 5 images or credits in your compression plan.
3. Host your images on a CDN
CDN stands for Content Delivery Network. Hosting your images on a CDN means setting up a CDN to serve them instead of having your own server to do that.
CDN are networks located all over the world with powerful web servers that take care of loading your site’s files to the visitor using the closest server to him, geographically speaking.
For example, if a visitor from South America arrives to your site, the CDN will serve it to him using a server located closer the visitor, instead of using one in Europe. That way the data of your website travels shorter distances, which impacts on the loading speed.
A CDN takes the heavy load off your server. It isn’t a replacement for your hosting service, but a way of adding an optimized server that will speed up your website.
There are several CDN providers. They typically offer different plans billed on a monthly basis or by data usage.
StackPath (formerly MaxCDN), is one of the most popular services.
CDN services usually offer a WordPress plugin so you can easily integrate it into your site. And if they not, cache plugins like WP Rocket or a plugin like CDN Enabler, let you connect your CDN service to your WordPress site.
4. Add a lazy load plugin
The logic behind the Lazy Load technique is to load the images on your site just before they have to appear in the browser’s viewport. Or, simpler: right before the user gets to see them.
With lazy loading, the image at the bottom of your site will load once the user gets closer to the bottom of your site and not when the site is loaded.
If fewer images are being loaded at the same time, this means huge savings of bandwidth and better performance. Images will only be loaded if needed, when needed.
There are many ways of applying Lazy Load to your site. If you’re using one of our WordPress themes, they already do that in many parts, like with featured images on the Blog, Magazine and Display modules.
The easiest way to add a lazy loading in WordPress, without touching a line of code, will be by using a plugin like Lazy Load by WP Rocket.
If your site includes pages full of images, like catalogs, galleries, and such, give it a try. Just install it and follow their instructions.
Recap
If you’re using images on your site –which, I’m sure you are–, taking care of optimizing them is a must.
It’ll improve your site’s performance, SEO and generate a better user experience.
Which one of these techniques will you try?
Hi Mai,
This is another very helpful post. Personally, as a photographer, I am using Photoshop and Lightroom to do the job, including a plugin called JPEGmini Pro (they don’t pay me to mention this…).
I have a question. What number of pixels/inch do you recommend? I used to use a standard resolution of 72 pixels per inch. Is this still valid, also considering retina screens?
Thanks,
Eric
Hi Eric! That’s a great question.
Actually, I learned that ppi or dpi don’t quite matter in terms of quality when using images on the web and not for print. The dimensions are what matter.
For retina devices 72ppi is fine, what you need to do is enlarging the image to twice its size. So instead of resizing your images to a width of 1400px as I mention in the post, you’d resize them to 2800px.
By the way, when using one of our themes, if you upload images that are big enough for retina devices (let’s say 2800px wide), the theme will automatically create versions for both retina and non-retina devices. Using the smaller images or the @2x images when needed.
The ppi does matter in terms of file size. The same 1000×1000 image will weight less if it has a 72ppi than if it has a 300ppi value. So it’s best if you keep using 72.
Most apps that allow you to “Save for web” won’t even let you modify the ppi value, they save the images at 72ppi by default.
Hope this helps!
Here are some articles that explain more deeply the ppi/dpi thing:
https://daraskolnick.com/image-dpi-web/
https://designmodo.com/design-retina-displays/
https://gist.github.com/anotheruiguy/8626483
Interesting article, we compress images via optimus plugin and it’s great.
Hi Faraz!
Thanks for sharing. How was your experience with Optimus? Is it easy to use? Are the results good?
Good article! However I’m going to respectfully disagree with your recommendation of using JPG over PNG for images. Although JPG provides for good file compression, it is a lossy compression. PNG offers the best of all worlds: allows for the good file size reduction of JPG without the data loss factor; allows for the thousands of colors of a JPG; allows for the clarity of a vector type image of a GIF; AND allows for transparency if needed. To me PNG wins hands down.
Hi JudyT! Thanks so much for your comment. I like respectful disagreements 🙂
Actually, I do recommend both of them PNG and JPG, just for different scenarios. What you explain about PNG is right, but the quality that it achieves comes at the expense of the file size. And that’s something to keep an eye on when you use the images on your website.
The image that I use as an example in the post weights 2.1 MB when exporting it as PNG. And that’s HUGE for the web. JPG allows for a compression that results in a lighter file while it maintains a pretty decent quality.
And as I said, if your images have a transparency, then yeah, that’s the case for a PNG (always with an eye on the file size!).
Thanks again!
ImageOptim (https://imageoptim.com) MUST get a mention. The best JPG and PNG compression on the web. A must-have for all Mac users.
Hi Simon! Thanks for your recommendation. I’m familiarized with ImageOptim but have never used it myself. Thanks 🙂