If you do client work of some kind you’re probably familiar with the term brief. A brief can totally set your project to get off on the right foot. So, if you write briefs on a daily basis or if you heard about it but don’t really know what it is or how to write one, this post is for you.
After the previous article on the things you need to know before you start working on a new project, we’ll talk now about how you can write a killing brief that will not only concentrate all the information about a project but will also elevate your work to the next level.
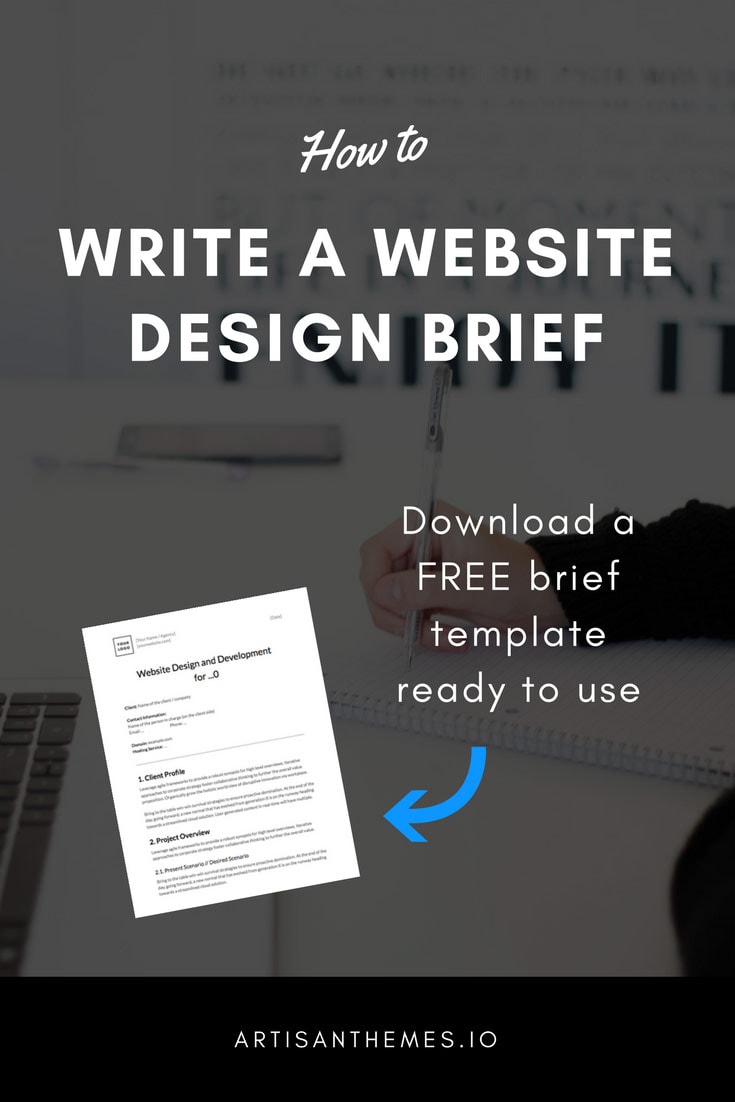
And a quick note before we begin: at the end of this post you’ll find a downloadable brief template ready to be used.
Let’s get started.
What’s a Website Design Brief
A design brief is a written document that summarizes all the relevant information about a project. As it includes an outlined strategy for the project, it’s an essential piece you need to have before starting any design work.
A brief sets the guidelines of a project, including background information, goals, requirements and technical directives so that every person involved in it can work towards the same purpose and find the information he needs in order to achieve it.
The word brief is defined as something “of short duration”. In other industries, like advertising, the brief is sometimes required to be as short as it can be. But the length of such a document will actually vary according to each designer, project and client. I wouldn’t worry about the length as long as it’s clear, understandable and provides the elements you need in order to take the project to a good end (no less, no more).
Typically, every web design project starts with a brief. Sometimes your client will send the first version with her requirements, but most of the times it’ll be you (the designer or the agency) who writes this kind of document.
A good brief helps closing deals
Imagine you’re a serious client looking for someone to make your project come true. You probably contacted 2 or 3 designers for the job. Let’s say they’re all experienced designers and you loved their portfolios.
One answered your email with a quote for what he thinks your project comprises. The other two ask you to meet with them to chat about the project.
Of those two, the first one gives you a quote right on the spot at the end of the meeting.
The last one also meets with you, hears about your project, asks questions, explains to you how he works and what he can do for you and the project. But he doesn’t say anything about pricing.
The day after that, this third designer sends you a written brief that reflects what you talked in the meeting, with a great project proposal and a quote.
Let’s say there’s not much of a difference in the price between the three cases, or that the last designer’s quote is even higher. Wich one of those 3 designers would you pick for the work?
The brief is your ultimate selling tool. As with any other piece you create, it has the power to communicate. If you write a good brief, it says something to your client:
“This designer is serious”
“This designer cares”
“This designer is already working on my project, he’s involved with it”
“This designer writes correctly”
“This designer knows what he’s doing”
…this designer makes sense.
A contract
A brief that both parts agree to will stand as a contract between the client and the designer/agency. It states the scope of the project, its requirements and expectations from both sides. The resulting website should reflect the strategy outlined in the document.
In addition, it sets the limitations regarding times and budget.
When things are clear between you and your client, the process will be much easier. Everyone will know what he’s supposed to do and when, and what to expect the other side to do and when.
A dynamic document
 A brief is a dynamic document. Once you write it down the first time it can go and come back as many times as it needs till it’s 100% aligned to the project and both parts involved are happy with it.
Don’t be afraid to rewrite some parts, the more adjusted it gets the clearer work you’re gonna do afterward.
Remember: the brief is a substantial part of the project, it’s supposed to help you in your development work. Making it good is making your future self a favor.
What about modifying it after it gets approved and the work started?
That’s fine too. There’s always a possibility that while working on the project you discover that some things need improvement. You can adjust any elements that you need. Just make sure the rest of the elements are still coherent with those changes (from the design specs to the budget).
Update the date of the new brief and remember to get all people involved notified about it so they can keep working with the updated document.
The 3 functions of a brief
Why is a design brief so important? A website design brief serves 3 big functions:
Before the project starts:
As a contract within the two parts.
During the project development:
As a guide to the work you need to do.
At the end of the process:
As a reference to the result you were supposed to achieve.
That means the brief will go along with you all the way. You need to make it your best friend.
What do you need to know about the project in order to write a brief
Now hold on a moment. Before you get your hands into writing the brief, there’s a lot of information you’ll need to know about the client and the project. I talked about this topic in the previous post of these series, so make sure you go over that article before you sit down to write a new brief.
The information you’ve collected on your meeting with the client will serve as the raw material for you to later shape in the brief.
How to write a website design brief
Each brief is different and you can adopt your own template. I prepared here a detailed list of the most common elements found in a design brief. This list will cover what I think are the keys to any project.
A well-built brief will include from administrative stuff to creative aspects and even technical requirements. That way nothing important gets left out, and every time you need to know something about the project you can come back to this document and be sure your answer will be here.
1. Project Details
- Date
- Project Title
- Client Name (Company/Organization/Individual)
- Contact Details
Name, Email and Phone number of your client or the person you keep contact inside the company (who is responsible for the communications about the project). - Domain
- Hosting Service
2. Client Profile
It’s a short description from which we learn who’s the voice behind the website we’re going to create. It’ll give us some background about the client.
It may include the following information:
– Company’s Mission
– History
– Products/Services
– Other relevant facts
3. Project Overview
This section will answer the question Why are you going to create this website? What’s the website aim?
You can divide the answer into 3 parts:
a. Present Scenario // Desired Scenario
Describing the present and the future is an important step of strategical thinking.
Once we understand where we’re standing today and where we’d like to be standing tomorrow, the picture of the path we need to walk in order to get there gets clearer.
It allows us to design processes that not only take us to that desired situation but actually respond to the resources and problems we have today.
Present Scenario
The Present Scenario, from the point of view of the client, is usually one of these two: we already have a website and we don’t like it or we don’t have a website and we think we need one. You’ll need to be prepared to work with both of them.
The “we want a better website” case is, for me, the most interest one. The client has the previous experience of having a site, but for some reason, it doesn’t work for him and his purposes. In this scenario we have so many things to question:
– How does the current website look?
– Why isn’t it achieving its goals (converting, getting readers, etc.)?
– What problems does it have?
– Is it a content problem, a UI problem, an architecture problem, a copywriting problem, a technical problem? All of these together?
– What strengths does it have, if any?
Understanding the answers to these questions will lead you the way. It’ll tell you how far you need to go and where you’ll need to work harder.
In the second case (“we need a website”) you get the simultaneous gift and pressure of crafting everything from scratch. The present scenario will be described as a non-online presence scenario (at least not a website), and you’ll need to detail why there’s a need to get online.
Desired Scenario
The Desired Scenario is a description of what that future with our site happily working will look like.
You shouldn’t try here to promise things you won’t be able to accomplish. Neither things that don’t rely exclusively on your work, like traffic or sales. The Desired Scenario works more as an ideal expression than as promised results.
Something like: “A website where people can turn to whenever they need an advice on parenting skills and childhood. A friendly place where young parents can spend their time and meet others like them to share their daily concerns and tips. A site that works in a synergic way with our social media channels (Facebook and Twitter) towards the growth of our online community”.
b. Goals
We discussed goals and objectives in the previous post of these series. If you didn’t read that yet, you can go and take a look as it explains how to write goals (with some examples too).
At this point, you need to understand that goals are the translation into action of the desired scenario you’ve described.
How will you get to that scenario? By trying to accomplish the stated goals.
And how do you know what goals to state? By clearly seeing the desired scenario.
c. Project Keys (or Guiding Principles)
We talked about making the brief clear and concise. So if you’re forced to resume the project in a few words, what those would be? What are the key ideas that will reflect the final result you’re chasing?
A few examples:
“Ecommerce – Authoritative – Credible”
“A site made for people who cares. – Friendly”
“A fresh look at an old value.”
“Approachable – A take me with you everywhere kind of site.”
“The ultimate digital resources site. – Digital leadership.”
Far from just being redundant, what you’re looking here is to make things as clear as possible. To stress the important.
If anyone else after you needs to work with this brief and you’re not there to explain it, after reading the Scenarios and the Goals, the Project Keys will help emphasize the essential guiding principles of the project.
With that said, the Desired Scenario, the Goals and the Project Keys must be consistent with each other and complement each other.
4. Target Audience
If the previous item answered to the why, this will answer to Who are you going to create the website for?
“Websites we create are meant to be for other people, because of those other people.”
In the previous “What do you need to know from your client before starting a new website project?” post, I wrote about the Target Audience issue. We talked about how important is getting to know the people you’re trying to get to and how to properly describe their profile.
Here you’ll detail the target’s profile so it is clear for everyone involved in the project.
A website can have more than one target. If it does, describe each profile and make sure they’re all considered in the Project Overview statements.
Exclusive Bonus: Download the Website Strategy Questionnaire. A comprehensive questionnaire that will help you understand any website’s strategy.
5. Website Specs
We got to the heaviest part of the brief in terms of specific site guidelines. This section will respond to How the website should look and work.
You’re gonna talk about content, functionality, visual considerations and technical requirements. All the hot stuff.
Content Structure
Let’s begin with the content structure. Write a list of the pages and sections the site will have. If it’s in the form of a sitemap or a tree, much better.
You can specify next to each page what type of content it’ll include: text / images / gallery / video / audio / contact form / etc., and also if the page will be dynamic or static (read more about that on the previous post).
When working with WordPress we have 2 types of basic content types: posts and pages. If you’ll need to develop a custom post type or custom fields for pages, specify that too here.
Examples of common custom post types would be portfolio, FAQs, branches, testimonials, etc. If you’re going to solve that with a plugin (like using WooCommerce for products) then you can specify its integration in the Functionality / Features section below.
Functionality / Features
In addition to the content architecture, you’ll need to specify whether the site will contain functionality that requires special attention or development. Some of the most common features are:
– CMS (for me it’s kind of obvious, but it’s always a good idea to specify that we’ll use WordPress as the CMS of the site and explain how it’ll benefit the site’s management).
– Ecommerce (…and which platform you’re going to implement? WooCommerce? Easy Digital Downloads?).
– Memberships integration / User login and user profile sections.
– Responsive (I can’t imagine a non responsive site nowadays, but anyway, you can take the opportunity to explain to the client that he’ll have a fully mobile adapted website).
– Retina ready.
– Forms integration.
– Search functionality within the whole site.
– Analytics.
– SEO related stuff.
– Integrations with social media.
– Google Maps integration.
Overall Look and Feel (Visual Considerations)
The site’s design should always be in concordance with the client’s visual identity. But it’ll also have its own look and feel that will respond to the project strategy.
Describing here that overall style will help setting you and your client on the same mind. Of course, you won’t have yet the final design in your mind, but based on the project overview and target you can have a rough idea of what you should aim for regarding the look and feel of the site.
Make here a list of those adjectives that describe the overall style of the site. Here’re a few you can use:
Elegant – Friendly – Prestigious – Dark – Light – Warm – Modern – Playful – Minimalist – Colorful – Serious – Approachable – Calm – Clean – Funny – Fashionable – Powerful.
Should you find yourself out of ideas, you can always practice your adjectives skills here or get inspired here 🙂
If you want you can also use visual references. Add some images to reflect the look and feel you’ll try to pursue.
Technical Information and Requirements
Here’s the place to throw all the acronym words you know. Those the client may not understand but needs to be aware of. Specify the coding languages the site you’re developing is going to use and what it will require from the Hosting service.
You can also mention which browsers will be supported. (Sorry, IE < 10!)
Other Websites Examples
How many times did you hear the saying A picture is worth a thousand words? As Wikipedia says:
“It refers to the notion that a complex idea can be conveyed with just a single still image or that an image of a subject conveys its meaning or essence more effectively than a description does.”
And sometimes it truly can. Therefore, the power of the live examples to accompany your words.
It’s advisable that you and/or your client provide examples of different websites that convey what the brief says.
Add examples of:
- Websites with the type of design you like or dislike (even if it’s from other industries).
- Websites with similar functionality (even if it’s from other industries).
- Websites that compete with yours (on their subject or target).
6. Maintenance and Support
Will you do be doing maintenance and support work after the project is done and delivered? If so, state the conditions here:
– For how long will you do it?
– What shall be considered support/maintenance and what will be treated as customization work?
– What are proper ways for the client to reach you for support: email/telephone/support forum?
7. Times & Schedule
Times are as important as money, my friend. For you and for your client both. So be sure you talk about this and give specific time limitations (they can be rough estimates but with a logical deadline).
There are two important things to describe here:
a. Total Time / Approximate Deadline
How much time is the work going to take from the moment you get everything you need and start working. You can estimate it in weeks.
b. Phases & Timeline
I like to divide the entire project into phases so the client gets an idea of how a development work looks like.
How much time each phase takes, what comes first and what after that, in which phase we’ll be working while he’ll be taking care of different aspects of the project.
You can also specify what are you going to need from your client on each of the phases, so he can prepare for that and your work gets smoother, cutting the waiting-for-materials times.
As an example:
Phase 1: Research and Inspiration
Estimated time: 1 week.
Materials needed: …
Phase 2: First Sketches
Estimated time: 10 days.
Materials needed: …
* Meeting for sketches presentation and approval.
Phase 3: Design
Estimated time: 2 weeks.
Materials needed: …
* Meeting for design presentation and approval.
Phase 4: Coding and Tests
Estimated time: 3 weeks.
Materials needed: …
Phase 5: Production
Estimated time: 3 days.
Materials needed: …
8. Budget
Here’s one of the most important elements of the brief. Because at the end, the realization of the project will depend on the client being able to pay the price of your work.
But there’s a reason why the budget is almost at the end of this brief and not before that.
An isolated number doesn’t mean anything.
We all get calls from friends asking if it’s okay to pay some X value for a website development work. Sometimes these are big numbers and sometimes these are really small ones.
I always reply them with my favourite two words: it depends.
And they don’t like it 🙂
But it really does. When talking about intangible services, a value is a subjective construction. There are so many factors interfering that it’s hard to say when a price is right or not. From technical stuff, development times and the size of the project, to branding positioning factors (how you position yourself as a designer/developer/agency).
 I think one possible answer is that the price is right when you feel comfortable with it and you find a client that is willing to pay that price. Whatever that price is.
And that’s why the budget is at this step of the brief.
Whatever the cost of the site will be, if everything you wrote before makes sense and justifies the value, then the client will accept the value as reasonable. That’s one of the biggest challenges of writing a good brief: making the items complement each other so there’s no question about whether the price is worth it or not.
Now, what do you need to write here?
a. The total cost of the project
Write the total value of the work you’re going to do.
If the total budget is really high and the project has several different parts, you may want to specify the price for each one of those parts and then write the total cost. For example:
Logo redesign: $—-.
Website design: $—-.
Website development: $—-.
TOTAL: $—-.
If you decide to do that, explain to the client that the prices are subject to signing for the whole package, so he doesn’t think he can remove one part of the project and still have the same price for the other parts. Which is indeed not true.
b. What does the total cost include
I like to shortly specify what does the cost cover in terms of type of work. For example:
Design / Development / Installation / Hosting Migration / Updates / 2 Months of Support / Max. 3 Design Revisions / etc.
c. Payment Methods
Specify your paying conditions. If you want to be paid in 2 payments (one half up front and one half at the end, for instance), if it’s through a wire transfer or check, if it’s in American Dollars, etc.
9. Additional Comments
Do you have any other relevant considerations that don’t fit in any of the previous items? Here’s the place to write them down.
You may want to mention what’s not included, for example: stock images.
You may want to specify what’s required in order to get started, like the identity material or some specific content, or hosting login credentials.
Tips to make your brief effective
Keep it clear and simple.
A brief is a communication piece. You’re not the only person who will use it. Keep it as simple and clear as you can, so everyone involved can understand it.
Write short sentences. Stick to the point. Use appropriate terminology. Explain technical terms if there’s the need to. Check the spelling. Use headings, sub-headings, bold, lists, everything that helps understand and organize the content of the document (use them cleverly).
Make sure you and your client understand everything stated in the brief in the same way.
When you send the brief to your client it might be a good idea to chat with him over the phone or meet in person if you prefer, to go over the items on the brief and explain anything that may need a more detailed explanation.
Let your client ask questions and ask for all the clarifications he may need. Check with him if he thinks there’s something missing. It’s better to find out about it now than later. We’re in a good moment to clarify things up.
Make sure there’s a coherence between all the elements in your brief.
Times should be in concordance with the development needs; the budget should cover the times scheduled; the visual aspects must respond to the goal of the site and the identity of the client; and so on.
Use it as a reference on every step of the development process.
Don’t forget a design brief is a guide to your work.
Every time you feel like you don’t know how to proceed, or you can’t decide which way to go, but also when you finished some part of the project: come back to the brief and make sure what you see in action matches what you and your client signed up for on the brief.
Learn from previous experiences.
My first briefs looked very different from the last ones. I learned from project to project how to improve the briefs I write in order to make them better fit my work.
That means:
- how they can better serve the project,
- how they can help me in the process of my development work,
- and how they can help convey confidence to the client (in me and in the project).
So take this post as an advice, test it out and then adjust it to your needs.
The Short List + Brief Template
Here’s a short list of the 9 items included in the brief. And you can download a brief template ready to use we prepared based on this post here. Enjoy!
1. Project Details
– Date
– Project Title
– Client Name
– Contact Details
– Domain
– Hosting Service
2. Client Profile
3. Project Overview
– Present Scenario // Desired Scenario
– Goals
– Project Keys
4. Target Audience
5. Website Specs
– Content Structure
– Functionality / Features
– Overall Look and Feel
– Technical Information and Requirements
– Other Websites Examples
6. Maintenance and Support
7. Times & Schedule
– Total Time / Approximate Deadline
– Phases & Timeline
8. Budget
– Total Cost
– What does the total cost include
– Payment Methods
9. Additional Comments
What comes next
After you sent the brief to your client, chatted with him about the specifics, and make sure everything’s OK, ask your client for the brief approval.
You’ve got it approved? Yay!
Take the approved brief and share it with all the people that will need to make use of it. If you want to, you can remove the Budget item from the shared file to keep it discreet (do not remove it from the one approved by your client, though).
Now go and start working on the web experience design. Research, get inspired and start sketching.
I may not save every little file from past projects (actually I do, in an external disk), but if there’s something I do keep at hand is a project’s brief. It’s like a patient history record for a doctor, a unique document containing the essential information about the project and the client.
Great!! It is a complete, detailed, very logical and useful guide
Thanks Daniel! I’m glad to read you found it useful.
I think that one of the most important things when it comes to this is that we should describe what features could improve or automate processes, such as gathering data and placing it into a database from a website form.
When we know this, we can suggest newer and better ways to structure some particular website to allow customers to do more business with its owner. We should strive to build solutions that are easier, faster, and simpler than websites that don’t include new technological advances.
I totally agree with that. I think a big part of our job is to provide solutions that -at least- see the design as a whole that should add to the client’s business.
Do you come from a Business Optimization standpoint when you approach an analysis like this? Or do you see it as part of your web Design job?
Fantastic article that every designer should keep in mind when starting out a new project This article definitely useful effective. Thanks for brief us.